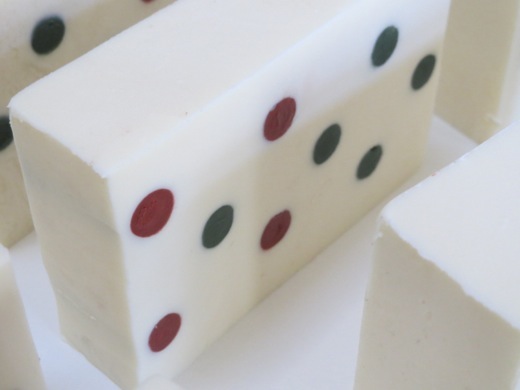
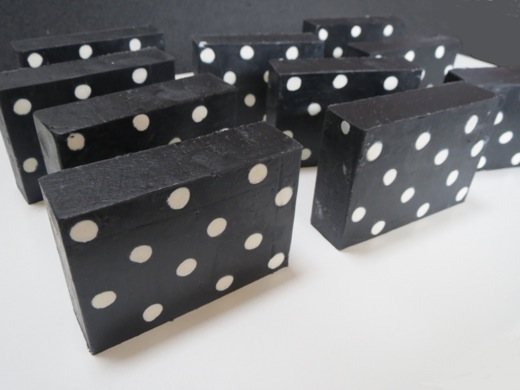
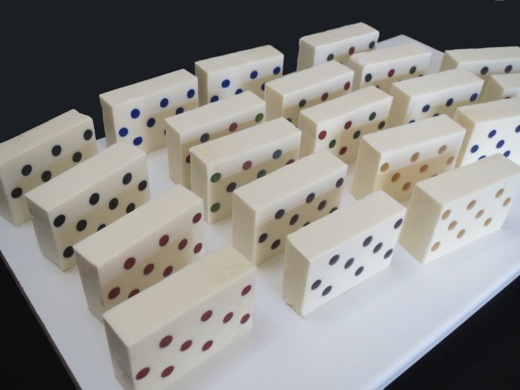
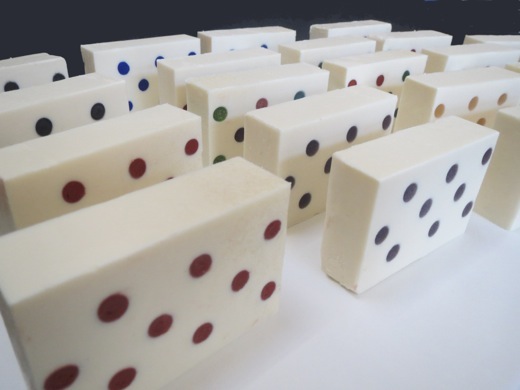
In the fashion and trendy, polka dot patterning or petit pois, first appeared in 1894 in England, never out of fashion, and turns and moves appears in full force.
Particularly like these pattern and the strange thing is that until then had not seen the petit pois decorating a soap. I had seen a few attempts but not the original pattern polka dots.
I decided to try and chatting with soapmaker Monica Carvalho of Saponem Opera (https://www.facebook.com/SaponemOpera?hc_location=stream), she gave me a precious tip on how to use a material to make the balls, without which it would move.
This material are the straws for beverage, made of polystyrene or polypropylene. The most common diameters are 6mm (soft drinks and juices), 8 mm (milkshake) and 9mm (turbo milkshake).
First you will create a polka dot pattern that you like, creating a template using any design software, taking into account the size of the mold and the size of the bars. This mold is a 9 x 15 cm that would 4 bars 9 x 7.5 cm and thickness 2.5 cm – the bars are cuthorizontally.
Then you place a layer about 2 mm in molding mass around the bottom of the mold. You can use something plump to extend the mass and leave a flat surface. I used here the modeling clay Acrilex brand for professional use, but can serve the modeling dough for children, these masses are much easier to work with, are softer.
 The modeling clay at the bottom of the mold, you position the template and with the aid of a needle stick you paper and marks the center of each ball
 Place the straws in this case was used to 6 mm in diameter, in the center of the marks made, and press to be trapped by the mass. Let the straws and vertically and perpendicular
Now just prepare the soap mass with the background color you want for the pattern of polka dots and let the light trace in order to even well into the mold. This is very important if the trace is thick, it is impossible leveling and work is compromised, it is not possible to use a spatula to flatten. Important work the mass at a low temperature and low soda concentration, something like 28 to 30%.
This silicone mold is not necessary to liner it. The amount of mass to be calculated considering the height of the bar plus 1 cm finish on both sides, the top and bottom.
After about 3 hours or if you have the gel formation and having dissipated the heat, carefully remove the straws of mass.
Is important not to remove the straws during the gel or the mass formed with heat, as this may collapse the cavity to remove the straws and even close the cavities.
Prepare the soaps that will make the colors of the polka dots. Here we used the black and green. To shed cavities is mandatory that the mass is very light trace otherwise it is impossible to completely fill the cavities. Tap the mold to accommodate the pasta well.
After 18 to 24 hours unmold the soap. This is the bottom of the soap block with the base of modeling clay removed.
 The base of modeling clay can be reused if removed carefully.
Then just cut the size of the individual bars. Here, in the foreground what’s left of the finish and four bars.


 This is a template for most 20 bar 9 x 6 cm lined with the modeling clay.
The template is positioned for marking the centers of straws. In this case a tube 9mm in diameter.
The markings made with a needle.
 Here 90 straws of 9 mm diameter trapped in the modeling clay
It is important to go in that lining is putting the straws.
The straw removed and ready to receive the colors that form the balls of polka dots.
 The straw can be reused by simply washing and drying.
 Was used several colors and also vegetable glycerin transparent base with cosmetics glitters.
The withdrawal of modeling clay, a little more difficult due to the low layer and the larger size.
 Cut the block to the formation of loafs, all following the initial drawing of the arrangement of the bars. We used a vertical cutter – a cutting wire is positioned vertically, perpendicular to the base of the cutter.

 The finishing cut on the faces of loafs,

 The amount of mass must be calculated with some precision to avoid wastage of material in the finish cut.
 The three loafs of soap petit pois.


 This is straws with 8mm in diameter, a total of 120 straws.
 A bamboo charcoal soap, soap widely used in Japan as a skin detox. This soap had trouble anticipating the removal of straws still with the gel phase in making progress there was a collapse of the cavity and lost half the mass of soap.

 That is, the possibilities are almost endless to combine colors and materials to get the polka dots, explore other innovations in filling cavities.


